Deploy a Static Site on Github

The following tutorial shows how to deploy a static site using Github Pages. This assumes you already have a Github account, have added code to the repository, and have a file called index.html in the root directory.

Click Settings

Click Pages

Set it up

  • For source, select Deploy from a branch
  • Under Branch, select main and choose the root directory
  • Click Save

View it live

It can take a few minutes, but once it is ready, the link to your live site will show near the top of the Page. Click the link and check it out.

The Case For External CSS

SCENARIO 1: REPEAT, REPEAT AGAIN

You start writing some html for a single web page. You add some inline styles to a p tag. You add a second p tag and have to type out the same inline styles to keep them consistent. The same thing happens with your headings, links, images, etc. You finish your single page site and get it live. A month later, you decide you want to change the color of your headers. You go from element to element updating the same code multiple times. You start to realize there is probably a better way to do this.

SCENARIO 2: A BETTER WAY

You start writing your html for a single web page. You add the style element to the head element. You add the p selector and declare some styles. These apply to all your p tags on the page. This is so much better. A week later, you decide to add another page to the site. You copy and paste the style element from one web page to the other to keep the styles consistent on your site. You add another page a few days later and have to do the same thing. A few weeks later, you decide to change the color of your headings. So, you go into all of your pages and update the same code in multiple places. You begin to realize there is probably a better way.

SCENARIO 3: THE BEST WAY

You begin writing your html for a single web page. You create a second file called styles.css which you pull into your html file using a link element. You begin adding styles for all your headings, p tags, links, images, etc. A week later you add another page to the site. You link it to the same styles.css file. A few week later you add another page to your site and utilize the same styles.css file. A month later, you decide to change the color of your headings. You go into styles.css and adjust the code. The changes are applied to all your web pages.

THE MORAL OF THE STORY

Use an external style sheet. This is considered best practice amongst most developers for the following reasons:

  • A single style sheet can be used for multiple web pages
  • Updating a style for the entire site only requires a change in one file
  • The HTML is cleaner and easier to read
grayscale photo of laptop computer

Web Design Basics

Much could be said about modern web design. Courses have been written and videos produced. Here, I give a quick overview of some basic concepts of good web design.

Clear Purpose

Good web design begins with the user in mind. Whether trying to convey a message, attract customers, make a sale, or provide a useful tool, the page should meet the need of the user in the most effective and efficient way possible. Start with a clear purpose in mind and stick to it. Don’t clutter the page with different types of content that makes it confusing for the user.

Clear Communication

Communication can take many forms, and will differ depending on the site, but there are some principles to keep in mind that will help deliver the message more effectively. Organize information in a meaningful way. Utilize headings, sub-headings, and paragraphs. You see this on most blogs and news sights. Different fonts, font-sizes, and font-weights are used to differentiate between the different elements.

Another way to communicate clearly is to use bullet points, icons, and images. People searching the web often want to find things quickly and won’t always read through long paragraphs. Use bullet points when appropriate. Icons have become a standard. Use icons that are obvious or intuitive to the user, such as a home icon or a back arrow.

Readability

Use appropriate typefaces/fonts. There are many different fonts and styles out there. Some look very unique and may have their place, but be aware that certain fonts are easier to read than others and think about whether or not the fonts you are using will be accessible to all. Typically sans-serif fonts are easier to read, such as Arial and Verdana.

Be aware of text and background contrast, especially when the text is over an image that has a variation in brightness or color. For example, white text over an image can often be difficult to read if the image has a light area.

Navigation

Users should be able to navigate your site with ease. If your site consists of multiple pages, there should be clear navigation. This can be done in a number of ways, such as, with a navbar, breadcrumbs, or clickable buttons. The easier it is for users to find what they are looking for, the less likely they are to get frustrated and leave your site. In general, users should be able to get where they want to go in three clicks or less.

video camera

CSS Color

Intro to CSS Colors

Colors are an important aspect of web design. They can help create a visual hierarchy, emphasize important elements, and establish a brand identity. With CSS, you have a wide range of color options available to you, from predefined color names to hexadecimal codes to RBG values. In this lesson, we explore some of the different ways to add colors to your website.

Color Names

CSS provides a list of predefined color names that you can use. These names are easy to remember and can save you time when you need a quick color change. Examples include red, green, blue, black, white, orange, purple, and many more. To use a color name in CSS, simply use the color name as the value for the color property. For example, if you want to make a heading red, you can use the following.

h1 {
  color: red;
}

Hexadecimal Colors

Hexadecimal values are another way to specify colors in CSS. Hexadecimal colors are represented by a six-digit code, with each digit representing a different component of the color (red, green, and blue). The values range from 00 to FF, with 00 being the darkest and FF being the lightest. For example, #FF0000 is pure red, #00FF00 is pure green, and #0000FF is pure blue. The example below sets the main heading to red using the hexadecimal value.

h1 {
  color: #FF0000;
}

RGB Colors

RGB stands for Red, Green, Blue. You can set a value for each of the three colors number from 0 to 255, where 0 means no amount of the color and 255 is the full amount. The example below uses rgb colors to turn the main heading red. Notice the first number, which stands for red is the full value of 255 and the green and blue values are set to 0.

h1 {
  color: rgb(255, 0, 0);
}

RGBA – Color and Opacity

RGBA is similar to the RGB color model, but includes an additional “Alpha” parameter, which represents the opacity of the color. The red, green, and blue values are still 0 to 255, but the additional value is set between 0 and 1 and refers to opacity. An opaque object does not allow light to go through it. So a value of 1 means totally opaque. A value of 0 means totally transparent. The example below will result in a main heading being red with an opacity of 0.5 or 50%.

h1 {
  color: rgba(255, 0, 0, 0.5);
}
film camera

Intro to CSS

What is CSS?

CSS stands for Cascading Style Sheet and is what we use to bring our html elements to life. We can use CSS to change the size of an element, provide color, add a border,
animate and much more.

CSS rules contain two parts: a selector and a declaration. The selector indicates the element or elements the rule applies to. A declaration describes how the elements are to be styled. In the code below, we are applying a font size of 18px to all p tags.

p {
  font-size: 18px;
}

Declarations contain two parts: a property and a value. In the code below, the color property is being given a value of yellow and the font-size property is being given a value of 32px. Also, notice that multiple declarations can be applied to a selector.

h1 {
  color: Yellow;
  font-size: 32px;
}

You can also apply the same styles to multiple selectors at the same time. Just separate them with commas.

h1, h2, h3 {
  font-family: "Times New Roman", Times, serif;
  font-size: 32px;
  letter-spacing: 3px;
}

Three ways to write your CSS?

External CSS

Using an external stylesheet is generally considered the best practice when it comes to writing CSS. This just means that you write all your styles in a separate file that has a .css extension. A common convention is to name it styles.css. Another convention is to name it based on the name of the html file. For example, if the html file is portfolio.html, you could write your styles in portfolio.css.

When you write your styles in an external style sheet, you need to wire it up to your html. You do this by adding a link tag to your html that tells the browser where to find the css file. The link tag requires an href attribute that contains the URL to the css file. It also requires the rel attribute which lets the browser know the relationship between the two documents. The link tag is added between the opening and closing head tags.

<!DOCTYPE html>
<html>
  <head>
    <title>What is CSS</title>
    <link href="styles.css" rel="stylesheet">
  </head>
</html>

Internal CSS

The second option is to write your CSS rules within the HTML page using the style element. This is typically placed inside the head element.

<!DOCTYPE html>
<html>
  <head>
    <title>What is CSS</title>
    <style>
      body {
        font-family: "Times New Roman", Times, serif;
        font-size: 18px;
      }

      h1,h2,h3,h4,h5,h6 {
        font-family: Arial, Helvetica, sans-serif;
        color: #333333;
      }
    </style>
  </head>
</html>

Keep in mind that internal styles are only applied to the specific page they are added to and that they will override external styles if both are used and both contain the same selector.

Inline CSS

Styles can be added to an individual HTML element using the style attribute. The attribute value is made up of property:value; combinations. Don’t forget to add the semi-colon at the end of each declaration and wrap them all in quotation marks. Inline styles only get applied to one element and they will override internal and external styles.

<p style="color:red;font-size:16px;">This text will be red</p>

The Case for External CSS

Scenario 1: Repeat, Repeat Again

You start writing some html for a single web page. You add some inline styles to a p tag. You add a second p tag and have to type out the same inline styles to keep them consistent. The same thing happens with your headings, links, images, etc. You finish your single page site and get it live. A month later, you decide you want to change the color of your headers. You go from element to element updating the same code multiple times. You start to realize there is probably a better way to do this.

Scenario 2: A Better Way

You start writing your html for a single web page. You add the style element to the head element. You add the p selector and declare some styles. These apply to all your p tags on the page. This is so much better. A week later, you decide to add another page to the site. You copy and paste the style element from one web page to the other to keep the styles consistent on your site. You add another page a few days later and have to do the same thing. A few weeks later, you decide to change the color of your headings. So, you go into all of your pages and update the same code in multiple places. You begin to realize there is probably a better way.

Scenario 3: The Best Way

You begin writing your html for a single web page. You create a second file called styles.css which you pull into your html file using a link element. You begin adding styles for all your headings, p tags, links, images, etc. A week later you add another page to the site. You link it to the same styles.css file. A few week later you add another page to your site and utilize the same styles.css file. A month later, you decide to change the color of your headings. You go into styles.css and adjust the code. The changes are applied to all your web pages.

The Moral of the Story

Use an external style sheet. This is considered best practice amongst most developers for the following reasons:

  • A single style sheet can be used for multiple web pages
  • Updating a style for the entire site only requires a change in one file
  • The HTML is cleaner and easier to read

CSS Selectors

There are many ways to target elements you want to style. Below are some of the more important ones to understand

Universal (*)

If you want to apply a specific style to every element on the page, you can use the universal selector *. In the example below, we set the box-sizing property on every element equal to border-box.

* {
  box-sizing: border-box;
}

Type (Tag name)

The type selector matches elements by tag name. The example below targets all p tags and applies the color purple.

p {
  color: purple;
}

Class (.)

The class selector is written with a period in front of the class name. When using the class selector in your CSS you are targeting all elements with the given class.

.text-red {
  color: red;
}

.text-green {
  color: green;
}

Id (#)

You can apply styles to a single element using the Id selector, which is identified by the hashtag (#) at the beginning.

#site-logo {
  border-radius: 50%;
  height: 50px;
  width: 50px;
}

Child (>)

You can style an element that is a direct child of another element by adding a greater than symbol (>) in between the parent and child. The following styles would be applied to any link that is a child of a list item.

li>a {
  color: black;
  text-decoration: none;
}

So, in the HTML code below, the styles above would not apply to the first link, since it is not a direct child of an li. The styles would be applied to the other two links.

<div>
  <a href="www.wombaco.com">Wombaco</a>

  <ul>
    <li>
      <a href="www.google.com">Google</a>
    </li>
    <li>
      <a href="www.yahoo.com">Yahoo</a>
    </li>
  </ul>
</div>

Descendant (space)

To style a descendant of an element you simply put a space between the selectors. Suppose you want to style all links within a div. You would use the following.

div a {
  color: black;
  text-decoration: none;
}

By using a space instead of > you are selecting all link elements that are nested inside of a div. They can be nested many levels deep. In the HTML below, there are three link elements that are inside the div. All of them will receive the styles from the code above.

<div>
  <a href="www.wombaco.com">Wombaco</a>

  <ul>
    <li>
      <a href="www.google.com">Google</a>
    </li>
    <li>
      <a href="www.yahoo.com">Yahoo</a>
    </li>
  </ul>
</div>

Adjacent Sibling (+)

To target an element that comes directly after another element, you place a plus sign between the selectors. In the code below, we are saying that any p element that comes right after an h1 element will be given the color red.

h1 + p {
  color: red;
}

In the HTML below you can see there are three p tags. Only the first will have red text. Notice that it comes after the closing h1 tag. It is not nested inside.

<h1>A main heading</h1>
<p>This text will be red</p>
<p>The text will not be red</P>
<p>This text will not be red</p>

General Sibling (~)

h1 ~ p {
  color: red;
}

To target multiple siblings of an element, you place a ~ between the selectors. In the code below, we are saying that any p element that is a sibling of an h1 element will be given the color red.

Inspecting Source Code in the Browser

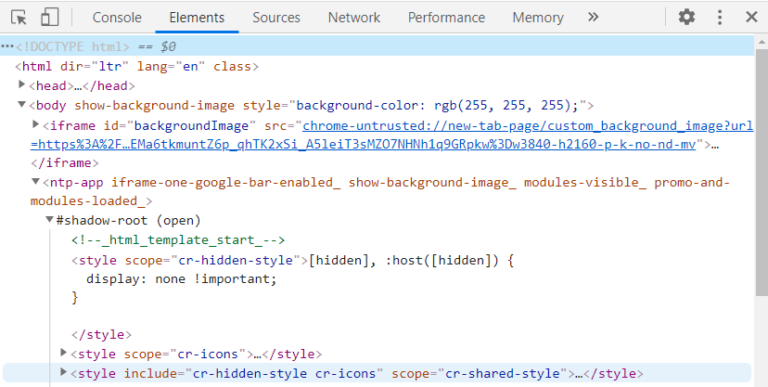
All modern browsers have developer tools that allow you to inspect the source code. For example, if you want to see what the HTML looks like on Google’s search page, you can open the inspector and take a look. Here is how to do so in Chrome.

Chrome

In Chrome, you can right click on the browser window and choose “Inspect” to open the dev tools.

clicking Inspect on Google search page

You can also use one of the following keyboard shortcuts:

  • Ctrl + Shift + C (Windows)
  • Command + Option + C (Mac, Linux, Chrome OS)

This should open the “Elements” tab, revealing the HTML.

How to Zip a folder

Windows

skip to Mac

  • Right click on the folder you want to zip
  • Click on “Send to”
  • Choose “Compressed (zipped) folder”

This should create the zip file in the same directory the folder is in.


Mac

  • Open Finder and navigate to the folder
  • Hold Control and tap the touch pad or click on your mouse
  • Select “Compress <name of file>”

This should create the zip file in the same directory the folder is in.

video camera

HTML Video

Overview

You can add video elements to a web page using the HTML5 <video> tags.

Video TAGS

The <video> element requires a src attribute to specify the URL of the file. You can use a relative URL if the file is hosted on your site or you could use an absolute URL to access files hosted on another site. There are a number of other attributes you may want to use. These are listed below, along with a description of what each is used for.

ATTRIBUTES

  • autoplay – Specifies that the video should start to play automatically when the page loads. In some browsers autoplay only works when the sound is muted. It does not work in some mobile browsers.
  • controls – Tells the browser to supply controls for playback.
  • height – specifies the height of the video element.
  • loop – Tells the browser to keep repeating the video
  • muted – specifies that the video should be silenced
  • poster – specifies the URL of an image to display while loading.
  • preload – tells the browser what to load when the page loads. You can choose from the following values.
    • none – tells the browser not to load the video until play is pressed.
    • auto – tells the browser to load the video on page load
    • metadata – tells the browser to collect information about the video, but not load the video until play is pressed.
  • src – The value specifies the URL of the audio file.
  • width – specifies the width of the video element.

Below is an example of a video element. The src value is a relative URL, since the file is hosted on this site. It utilizes the controls, autoplay, loop and muted attributes (no values are required for these).

<video src="/wp-content/uploads/2021/01/ray.mp4" controls autoplay loop muted></video>

Media Types

There are three types of video files you can use with the video tags.

  • MP4 – This is the most commonly used file type and is supported by all modern browsers
  • WebM – This file type is supported in most browsers at this time.
  • Ogg – Currently not supported by Safari.

Source Tags

You can supply more than one video file by using source tags. Let’s say you want you use an Ogg file, but knowing that Safari does not support the Ogg file type, you may want to add a backup MP4 file as well. You can do this by supplying two <source> tags between the opening and closing video tags. The browser will try the first source and if it is unable to play, it will try the next. The source tags take the src and type attributes. Note, the src attribute is not needed on the opening video tag when using source tags.

<video controls autoplay muted>
  <source src="/wp-content/uploads/2021/01/waterfall.ogg" type="video/ogg" />
  <source src="/wp-content/uploads/2021/01/waterfall.mp4" type="video/mp4" />
  Your browser does not support html video tags.
</video>

Summary

Video can be added to a website using video tags. You can supply the source file using the src attribute on the opening video tag or by using source tags between the opening and closing video tags. You can supply multiple files using multiple source elements.

sound board

HTML Audio

Overview

You may want to add sound effects to your site or allow users to play music. In this lesson you will learn how to add audio to a website using the HTML5 <audio> tags.

Audio Tags

The <audio> tag requires a src attribute to specify the URL of the file. You can use a relative URL if the file is hosted on your site or you could use an absolute URL to access files hosted on another site. There are a number of other attributes you may want to use. These are listed below, along with a description of what each is used for.

Attributes

  • controls – Tells the browser to supply controls for playback
  • autoplay – Specifies that the audio should start to play automatically
  • loop – Tells the browser to keep repeating the audio
  • muted – specifies that the audio should be silenced
  • preload – tells the browser what to load when the page loads. You can choose from the following values.
    • none – tells the browser not to load the file until play is pressed.
    • auto – tells the browser to load the file on page load
    • metadata – tells the browser to collect information about the audio file, but not load the file until play is pressed.
  • src – The value specifies the URL of the audio file

Below is an example of an audio element. The src value is a relative URL, since the file is hosted on this site. It utilizes the controls attribute (no value is needed). The preload attribute is set to “auto”.

<audio controls src="/wp-content/uploads/2021/01/jailhouse_rock.mp3" preload="auto"></audio>
Elvis Presley – Jailhouse Rock

Media Types

There are three types of audio files you can use with the audio tags.

  • MP3 – This is the most commonly used file type and is supported by all modern browsers
  • WAV – This file type is supported in most browsers at this time, with the exclusion of IE.
  • OGG – Currently not supported by Safari or IE.

Source Tags

You can supply more than one audio file by using source tags. Let’s say you want you use an OGG file, but knowing that Safari does not support the OGG file type, you may want to add a backup MP3 file as well. You can do this by supplying two <source> tags between the opening and closing audio tags. The browser will try the first source and if it is unable to play, it will try the next. The source tags take the src and type attributes. Note, the src attribute is not needed on the opening audio tag when using source tags.

<audio controls>
  <source src="/wp-content/uploads/2021/01/elvis.ogg" type="audio/ogg" />
  <source src="/wp-content/uploads/2021/01/elvis.mp3" type="audio/mpeg" />
</audio>
Elvis Presley – Can’t Help Falling in Love

You may also want to display a message to a user if their browser does not support the HTML5 audio tag. This can be done easily by adding some text between the opening and closing audio tags as in the example below.

<audio controls>
  <source src="/wp-content/uploads/2021/01/elvis.ogg" type="audio/ogg" />
  <source src="/wp-content/uploads/2021/01/elvis.mp3" type="audio/mpeg" />
  Your browser is not compatible with our audio files
</audio>

Summary

Audio can be added to a website using audio tags. You can supply the source file using the src attribute on the opening audio tag or by using source tags between the opening and closing audio tags. You can supply multiple files using multiple source elements.